Hampton Bay 51271 Installation Guide
Browse online or download Installation Guide for Household fans Hampton Bay 51271. Hampton Bay 51271 Installation Guide User Manual
- Page / 16
- Table of contents
- TROUBLESHOOTING
- BOOKMARKS
- Palisades 1
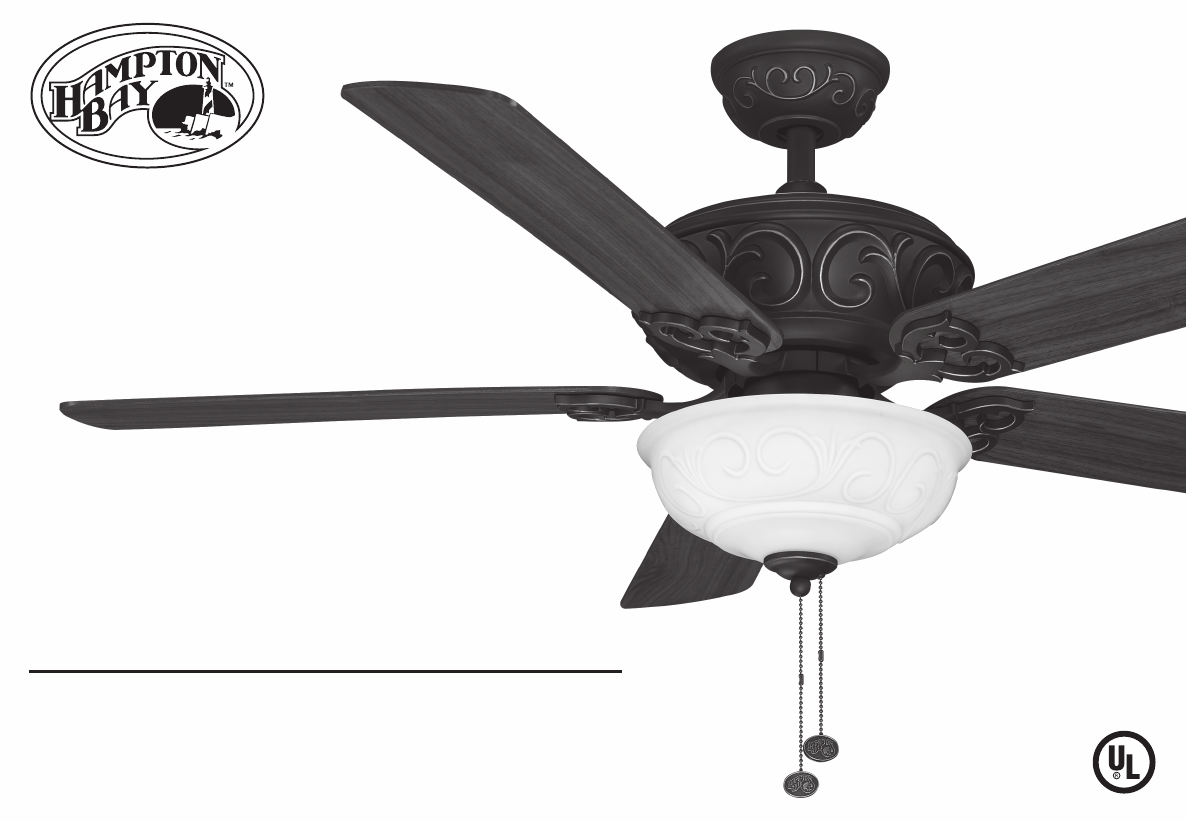
- 52 in Ceiling Fan 1
- Owner’s Manual 1
- 52” Palisades 2
- Safety Rules 1 3
- 2. Unpacking Your Fan 4
- Installing Your Fan 3 5
- Hanging the Fan 6
- “Close-to-Ceiling” Mounting 7
- Installing Fan to 8
- Making the Electrical 8
- Connections 8
- SUPPLY CIRCUIT 9
- Attaching the 10
- Fan Blades 10
- Blade Balancing 11
- Attaching the Light 11
- Kit/Glass Bowl 11
- THE INSTALLATION IS THE SAME 12
- Operating Your Fan 11 13
- Care of Your Fan 14
- Troubleshooting 14
- Specications 13 15
- 14. Warranty Information 16
Summary of Contents
Palisades52 in Ceiling Fan Owner’s ManualPalisadesVentilador de Techo de 1,32 mManual del Propietario 150 mm213 mm
CLOSE-TO-CEILING MOUNTING1. Carefully unhook the fan from the mounting plate and align the locking slots of the ceiling canopy with the two screws in
9.Reverse Switch CupSwitchSwitch CupLight KitBlueBlackWhiteSerratedHeadScrew(3)NotchCover Key Slot HolesFigure 15Blade BalancingAll blades are groupe
Fan Without Light Kit1. In order to use the fan without the light kit, remove the switch cup cover from the top of the light kit by removing the cent
Figure 18Figure 19Turn on the power and check the operation of the fan. The pull chain controls the fan speeds as follows: 1 pull - High, 2 pulls - Me
12. Care of Your Fan and TroubleshootingCare of Your FanHere are some suggestions to help you maintain your fan.1. Because of the fan’s natural move
Specications 13.FAN SIZE SPEED VOLTS AMPS WATTS RPM CFMNET WEIGHTGROSS WEIGHTCUBE FEET52”Low 120 0.25 14.7 70 216024.4 Lbs(11.1 kg)27.9 Lbs(12.7 kg)2
14. Warranty InformationHampton Bay Lifetime Limited WarrantyLifetime Warranty on MotorHampton Bay warrants the fan motor to be free from defects in w
52” PalisadesCeiling Fan by Hampton BayAccu-arm™ for Accurateand Easy Installation Steeper Blade Pitch forGreater Air Movement3-Speed Reverse Function
Safety Rules ... 1Unpacking Your Fan ... 2Installing Your Fan ... 3Operating Your F
a. Mounting Hardware (1 hanger pin, 1 locking pin, 1 rubber gasket)b. Electrical Hardware (3 plastic wire connectors, 1 pull chain for the fan, 1 p
Installing Your Fan 3. Tools RequiredPhillips screw driver, straight slot screw driver, adjustable wrench, step ladder, and wire cutters.Mounting Opt
Standard Ceiling Mounting1. Loosen the 2 screws in the collar on the top of the motor assembly2. Remove the canopy ring from the canopy by turning t
“Close-to-Ceiling” Mounting1. Remove the canopy ring from the canopy by turning the ring to the right until it unlocks (Figure 5).2. Remove the moun
6.EACH WIRE NUT (WIRE CONNECTOR) SUP-PLIED WITH THIS FAN IS DESIGNED TO ACCEPT UP TO ONE 12 GAUGE HOUSE WIRE AND TWO WIRES FROM THE FAN. IF YOU HAVE L
7.Figure 12BLUEBLACKWHITEGREENBLUEBLACKWHITEWHITEOutlet BoxSUPPLY CIRCUITGreenGroundingLeadBLACKWHITEGround to DownrodELECTRICAL DIAGRAMS ARE FOR REFE
Related products and manuals for Household fans Hampton Bay 51271

 (32 pages)
© 2020, manymanuals.com. All rights reserved. | 1.319 s |
 Manymanuals.com
 Manymanuals.de
 Manymanuals.fr
 Manymanuals.it
 Manymanuals.pl
 Manymanuals.cz
 Manymanuals.es
 Manymanuals-pt.com
Comments to this Manuals